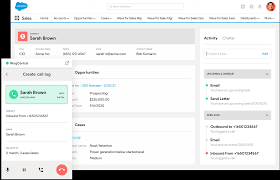
RingCentral integration: With the Copper and RingCentral integration combining your phone system and CRM is all about saving you time!
Tech mistake | We’re going to cover getting the integration set up for the first time for both admins and users. Make sure to view our Technical Requirements before you get started.
Admins
Enable the RingCentral integration in your Copper settings
1. Log in to Copper from the website application (this cannot be accessed through the mobile app or the extension).
2. Navigate to Settings > Integrations and find the RingCentral tile and click “CONNECT”:

3. Sign in to your RingCentral account:

4. Authorize your account:

5. Now the RingCentral Integration tile will show that your account is connected:

Map your Copper users to their RingCentral extensions
Before your Copper users can start using the webphone, their RingCentral extension needs to be mapped to their Copper user. This mapping allows the Copper system to identify users when it comes to calling logging.
1. If you are not already logged in, log in to Copper from the website application (this cannot be accessed through the mobile app or the extension).
2. Navigate to Settings > Integrations and find the RingCentral tile and click “Settings”:

3. You should now see the RingCentral Settings page:

4. Locate the extension of the user you want to map to, and select them using the dropdown menu to the right:

5. Repeat these steps for each additional user you need to map.
6. Don’t forget to save when you are done!

7. The users who have been paired with their extensions in the above steps will see the phone app in Copper the next time they log in or after they refresh their browser page:

Sending instructions to your users to set up their accounts
Once the RingCentral integration is enabled, Copper users have to enable the webphone in their accounts. Here are the instructions for users:
Users
First time log in
To make and receive calls using the Copper webphone you have to connect your Copper account to your RingCentral account.
1. Log in to Copper from the website application (this cannot be accessed through the mobile app or the extension).
2. In the upper right-hand corner you should see your phone in an inactive state:

If you do not see the phone icon, contact your administrator to set up the integration.
3. Log in to RingCentral by either clicking on the phone icon, or navigating to Settings > Phone Settings and click on Login:

3. Sign in to your RingCentral account:

4. Authorize your account:

5. Now your phone app will show as activated!

Configure your caller id
When you call someone using the Copper webphone, you can decide what number you want to show on the other party’s caller ID (“Outbound Caller ID”). You can change this setting at any time.
1. If you are not already logged in, log in to Copper from the website application (this cannot be accessed through the mobile app or the extension)
2. Navigate to Settings > Phone Settings.
3. Use the Outbound Caller ID field to select which number you want to be displayed when you call someone:

Receiving calls in Copper
The Copper webphone can receive phone calls, when someone calls your VoIP extension it can ring and you can answer the call from the web app. When you enable the webphone, by default your account is set to receive phone calls. If you want to change this setting:
1. In the web app go to System Settings > Phone settings
2. Locate the “Receive phone calls in the Copper app” setting and change it to suit your needs:

Test your headphones
Finally, to make sure your headphone or speakers work correctly, play a test sound from the web app:
1. In the web app go to System Settings > Phone settings
2. Locate the “Play test sound” option and click to see if you can hear it clearly!
The article was originally published here.
